Tag: Virtualizzazione

Windows Server 2022 su vmware ESXi e patch KB5022842

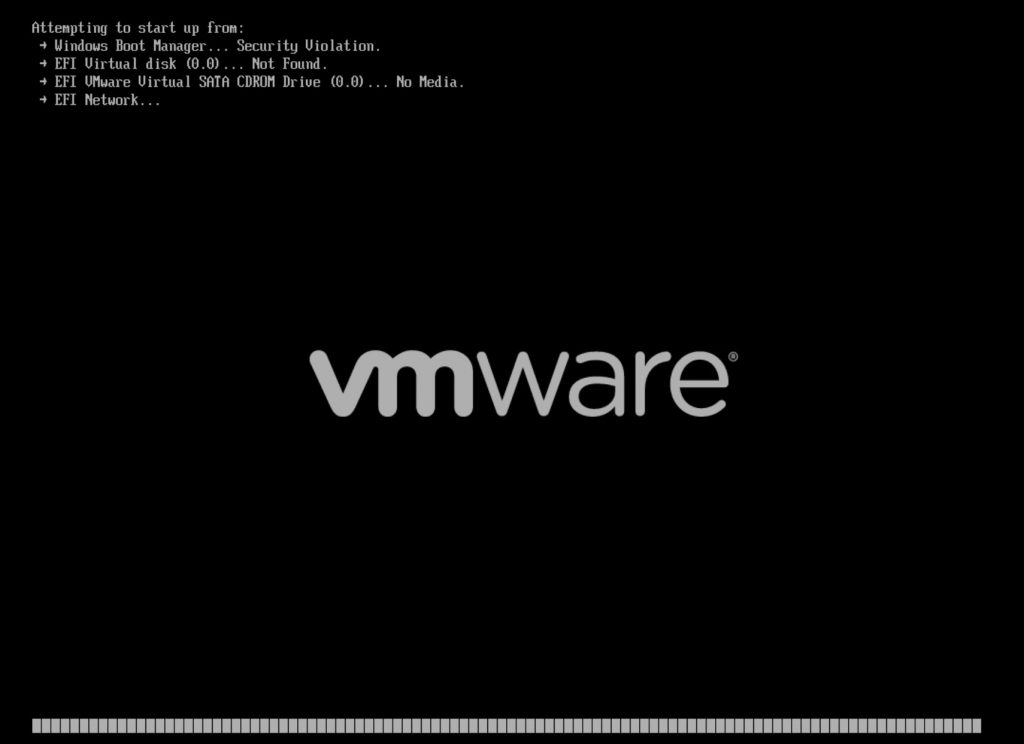
L’installazione di un aggiornamento cumulativo (2023-02 Cumulative Update for Microsoft server operating system version 21H2 for x64-based Systems (KB5022842)) impedisce il corretto avvio della VM:

Riavvio dopo l’installazione della KB5022842

Al momento non ci sono soluzioni ne da parte di vmware ne da parte di Microsoft.

I consigli sono essenzialmente due: non installare la patch oppure disabilitare l’avvio sicuro.

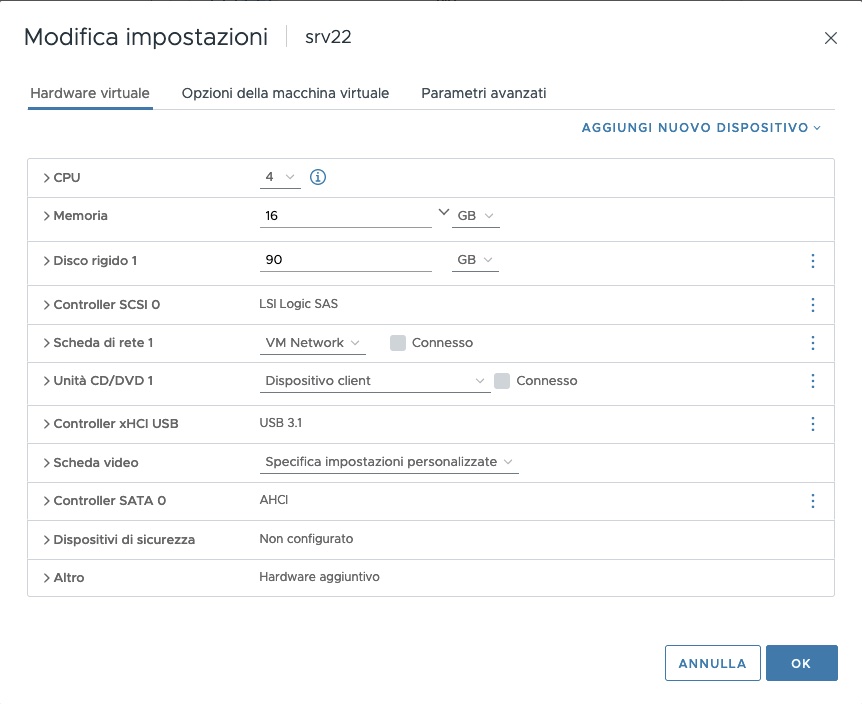
Per disabilitare l’avvio sicuro dobbiamo andare sulle impostazioni della macchina virtuale:

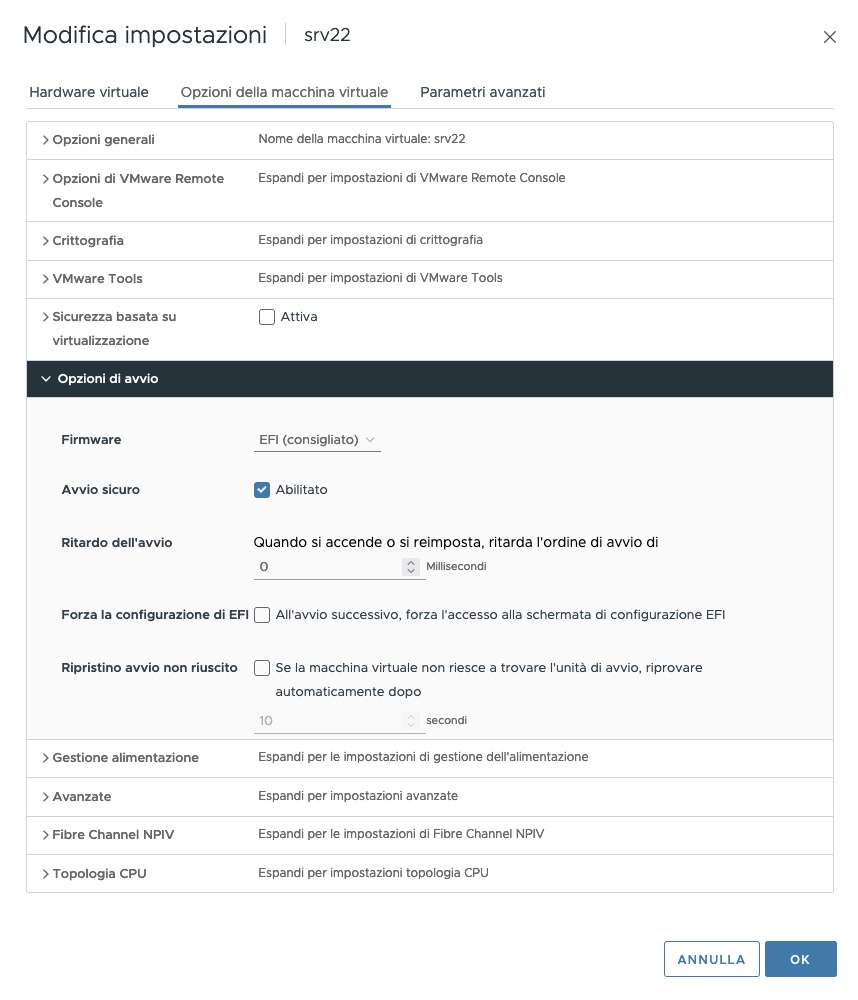
Accedere alla tab “Opzioni della macchina virtuale”:

e disabilitare l’opzione “Avvio sicuro” nelle opzioni di avvio

vCenter Single Sign-On – no healthy upstream

Tra le migliaia di cause per questo dannato errore di “no healthy upstream” c’è anche la possibilità che i certificati interni siano scaduti.

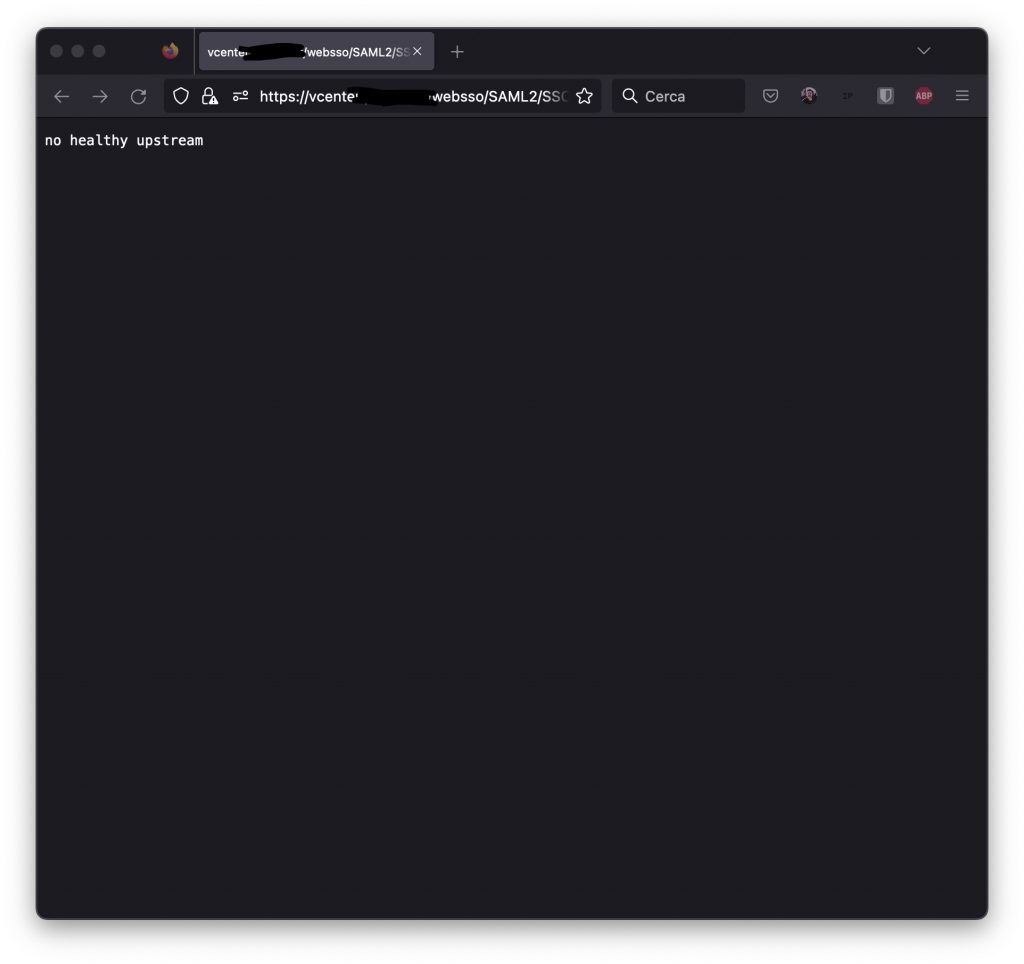
Ci troviamo con una pagina bianca (o scura, a seconda del tema…) e la sola dicitura “no healthy upstream”:

Tra le possibili soluzioni, prima di tentare una reinstallazione completa del vCenter, verifichiamo che i certificati siano ok. Da una sessione SSH proviamo a fare un controllo

root@vcenter [ /etc/vmware/vsphere-ui ]# for store in $(/usr/lib/vmware-vmafd/bin/vecs-cli store list | grep -v TRUSTED_ROOT_CRLS); do echo "[*] Store :" $store; /usr/lib/vmware-vmafd/bin/vecs-cli entry list --store $store --text | grep -ie "Alias" -ie "Not After";done;

Otteniamo un elenco dei certificati e delle scadenze

[*] Store : MACHINE_SSL_CERT
Alias :	__MACHINE_CERT
            Not After : Nov  1 10:26:08 2022 GMT
[*] Store : TRUSTED_ROOTS
Alias :	b88fd8df2674612aaadccbac0140ace59464a9d0
            Not After : Oct 26 22:26:08 2030 GMT
[*] Store : machine
Alias :	machine
            Not After : Oct 26 22:26:08 2030 GMT
[*] Store : vsphere-webclient
Alias :	vsphere-webclient
            Not After : Oct 26 22:26:08 2030 GMT
[*] Store : vpxd
Alias :	vpxd
            Not After : Oct 26 22:26:08 2030 GMT
[*] Store : vpxd-extension
Alias :	vpxd-extension
            Not After : Oct 26 22:26:08 2030 GMT
[*] Store : hvc
Alias :	hvc
            Not After : Oct 26 22:26:08 2030 GMT
[*] Store : data-encipherment
Alias :	data-encipherment
            Not After : Oct 26 22:26:08 2030 GMT
[*] Store : APPLMGMT_PASSWORD
[*] Store : SMS
Alias :	sms_self_signed
            Not After : Oct 31 22:31:21 2030 GMT
[*] Store : wcp
Alias :	wcp
            Not After : Oct 31 22:23:31 2022 GMT

Ci sono un paio di certificati scaduti, dannato mondo. Andiamo nella cartella /usr/lib/vmware-vmca/bin e eseguiamo il certificate-manager

root@vcenter [ /usr/lib/vmware-vmca/bin ]# ./certificate-manager
 _ _ _ _ _ _ _ _ _ _ _ _ _ _ _ _ _ _ _ _ _ _ _ _ _ _ _ _ _ _ _ _ _ _ _ 
|                                                                     |
|      *** Welcome to the vSphere 6.8 Certificate Manager  ***        |
|                                                                     |
|                   -- Select Operation --                            |
|                                                                     |
|      1. Replace Machine SSL certificate with Custom Certificate     |
|                                                                     |
|      2. Replace VMCA Root certificate with Custom Signing           |
|         Certificate and replace all Certificates                    |
|                                                                     |
|      3. Replace Machine SSL certificate with VMCA Certificate       |
|                                                                     |
|      4. Regenerate a new VMCA Root Certificate and                  |
|         replace all certificates                                    |
|                                                                     |
|      5. Replace Solution user certificates with                     |
|         Custom Certificate                                          |
|         NOTE: Solution user certs will be deprecated in a future    |
|         release of vCenter. Refer to release notes for more details.|
|                                                                     |
|      6. Replace Solution user certificates with VMCA certificates   |
|                                                                     |
|      7. Revert last performed operation by re-publishing old        |
|         certificates                                                |
|                                                                     |
|      8. Reset all Certificates                                      |
|_ _ _ _ _ _ _ _ _ _ _ _ _ _ _ _ _ _ _ _ _ _ _ _ _ _ _ _ _ _ _ _ _ _ _|
Note : Use Ctrl-D to exit.
Option[1 to 8]: 8

Resettiamo tutto con l’opzione “8”, se serve possiamo:

# service-control --stop vsphere-ui
# service-control --start vsphere-ui

Dovrebbe essere tutto ok 🙂

ESXi aggiornamento da linea di comando

Aggiorniamo il nostro server ESXi da linea di comando.

Ci connettiamo attraverso SSH al server (ssh root@esxi) e controlliamo la versione installata:

esxcli system version get
 Product: VMware ESXi
 Version: 6.5.0
 Build: Releasebuild-4887370
 Update: 0
 Patch: 9

a questo punto abilitiamo le connessioni in uscita http:

esxcli network firewall ruleset set -e true -r httpClient

e vediamo quali versioni sono disponibili per l’aggiornamento:

esxcli software sources profile list -d https://hostupdate.vmware.com/software/VUM/PRODUCTION/main/vmw-depot-index.xml | grep ESXi-6.5

ESXi-6.5.0-20170304101-no-tools VMware, Inc. PartnerSupported 2017-04-07T06:05:06 2017-04-07T06:05:06
ESXi-6.5.0-20170104001-no-tools VMware, Inc. PartnerSupported 2017-04-07T06:05:07 2017-04-07T06:05:07
ESXi-6.5.0-4564106-no-tools VMware, Inc. PartnerSupported 2016-10-27T05:43:44 2016-10-27T05:43:44
ESXi-6.5.0-20170304001-standard VMware, Inc. PartnerSupported 2017-04-07T06:05:06 2017-04-07T06:05:06
ESXi-6.5.0-20170301001s-no-tools VMware, Inc. PartnerSupported 2017-04-07T06:05:07 2017-04-07T06:05:07
ESXi-6.5.0-20170404001-standard VMware, Inc. PartnerSupported 2017-04-07T06:05:06 2017-04-07T06:05:06
ESXi-6.5.0-4564106-standard VMware, Inc. PartnerSupported 2016-10-27T05:43:44 2016-10-27T05:43:44
ESXi-6.5.0-20170404001-no-tools VMware, Inc. PartnerSupported 2017-04-07T06:05:06 2017-04-07T06:05:06
ESXi-6.5.0-20170304001-no-tools VMware, Inc. PartnerSupported 2017-04-07T06:05:07 2017-04-07T06:05:07
ESXi-6.5.0-20170104001-standard VMware, Inc. PartnerSupported 2017-04-07T06:05:07 2017-04-07T06:05:07
ESXi-6.5.0-20170301001s-standard VMware, Inc. PartnerSupported 2017-04-07T06:05:06 2017-04-07T06:05:06
ESXi-6.5.0-20170304101-standard VMware, Inc. PartnerSupported 2017-04-07T06:05:06 2017-04-07T06:05:06

La lista è limitata dal “grep ESXi-6.5” per essere un minimo più leggibile.

L’ultima versione disponibile è la “ESXi-6.5.0-20170404001-standard“.

La installiamo con il comando:

esxcli software profile update -d https://hostupdate.vmware.com/software/VUM/PRODUCTION/main/vmw-depot-index.xml -p ESXi-6.5.0-20170404001-standard

A questo punto è necessario un riavvio
Dopo il riavvio dell’host controlliamo la versione installa:

esxcli system version get
 Product: VMware ESXi
 Version: 6.5.0
 Build: Releasebuild-5310538
 Update: 0
 Patch: 19

🙂